Photographing And Editing Jewellery
Photographing And Editing Jewellery
I see many questions being asked about photographing and editing jewellery, how to get that clean white background. I’m going to describe how I edit my jewellery photographs using Photoshop. As a cheaper option, Photoshop Elements will also do the same job and I’m sure there are other free programs online.
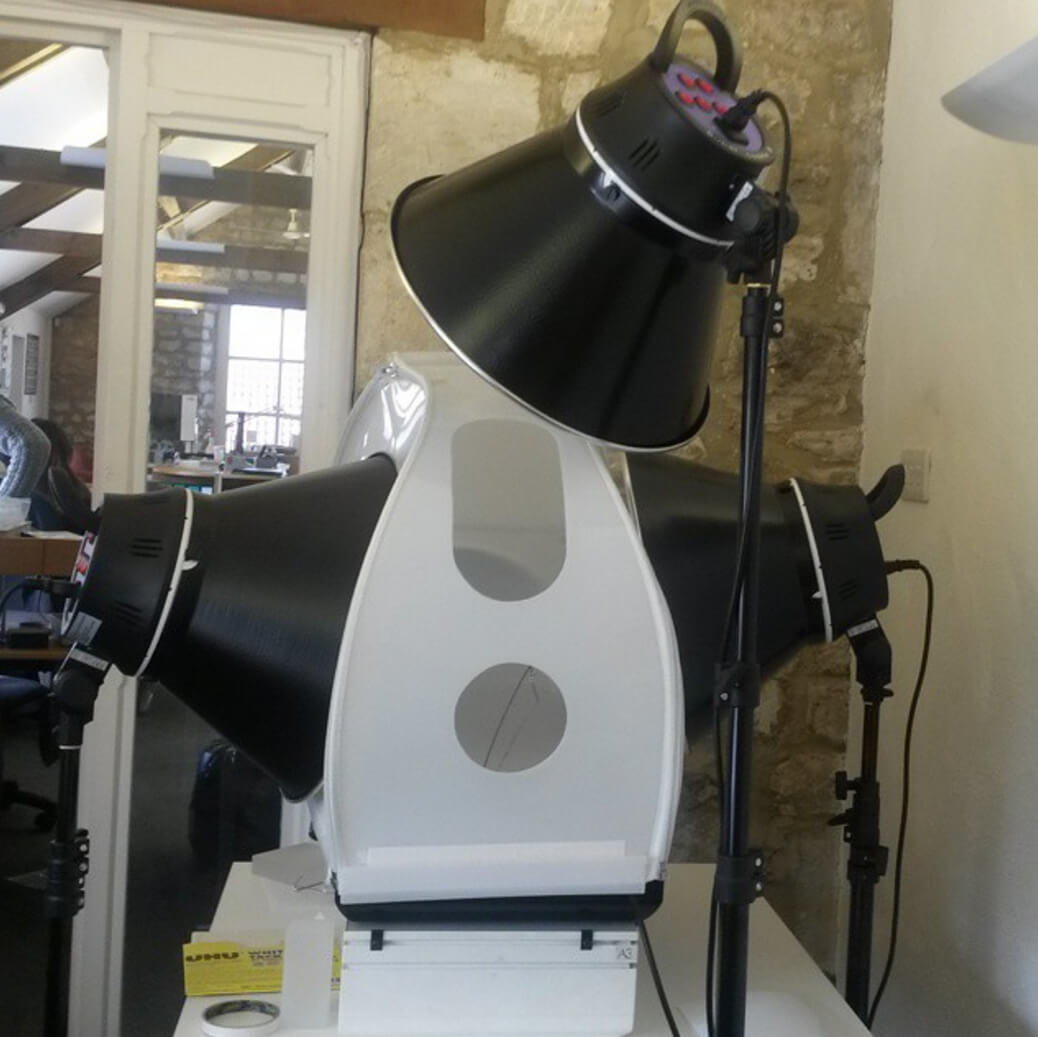
The photography set up used
I use a light tent and LOTS of lights, as much light as I can get, there is also an A3 light box underneath the acrylic tent although I don’t use this often. You can find cheap light boxes online or even make your own. There are cheaper smaller lights to buy online but make sure they offer constant light rather than flash lighting.
I use a DSLR camera with a macro lens on F22 whilst using a tripod and testing the light balance often.

The original Unedited photograph
Once you have taken your photograph and opened it in Photoshop it will look fairly similar to the photo above; a little bit dull. Either press CTRL + L or Image: Adjustments: Levels to reveal the levels tab. Click on the Set White Point button shown above, then click on the background you would like to be white. Click in several places until you are happy enough with the result. Then press OK.
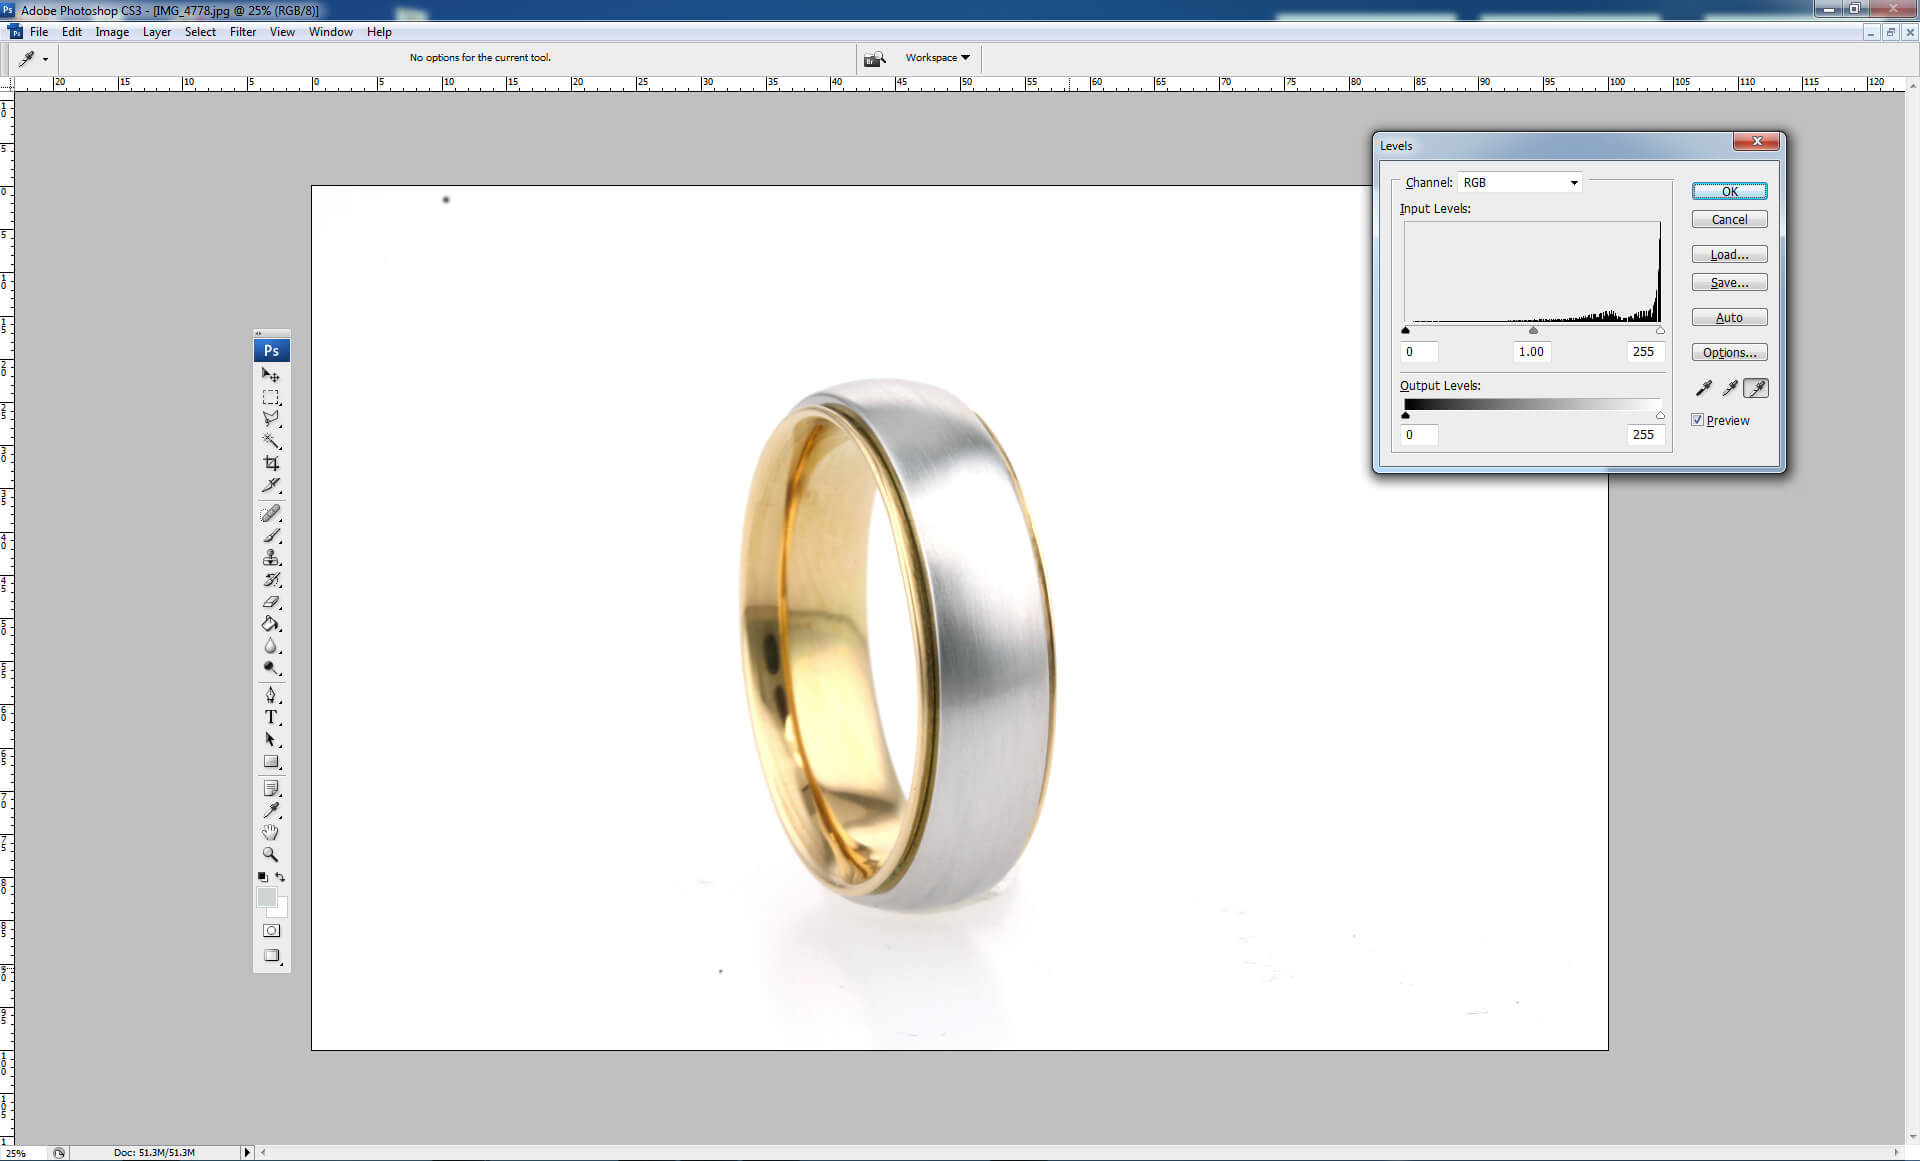
Changing the levels of the photograph.
You will find you will get a good white background like above.

Using the wand to select the background
Using the wand button as shown, click the background. With the tolerance set to 10 you will be able to select most of the white background. You may need to press the shift button whilst clicking different areas of the background to select more.
The tolerance setting at the top of the screen controls the amount of one colour you can select. For example, a tolerance set to 0 will only select a very precise colour that you have selected, if the whole of the background was pure white you would be able to select it all. A tolerance set to 10 will select more shades of the same colour, in this case, white, it will also pick some of the shadows.
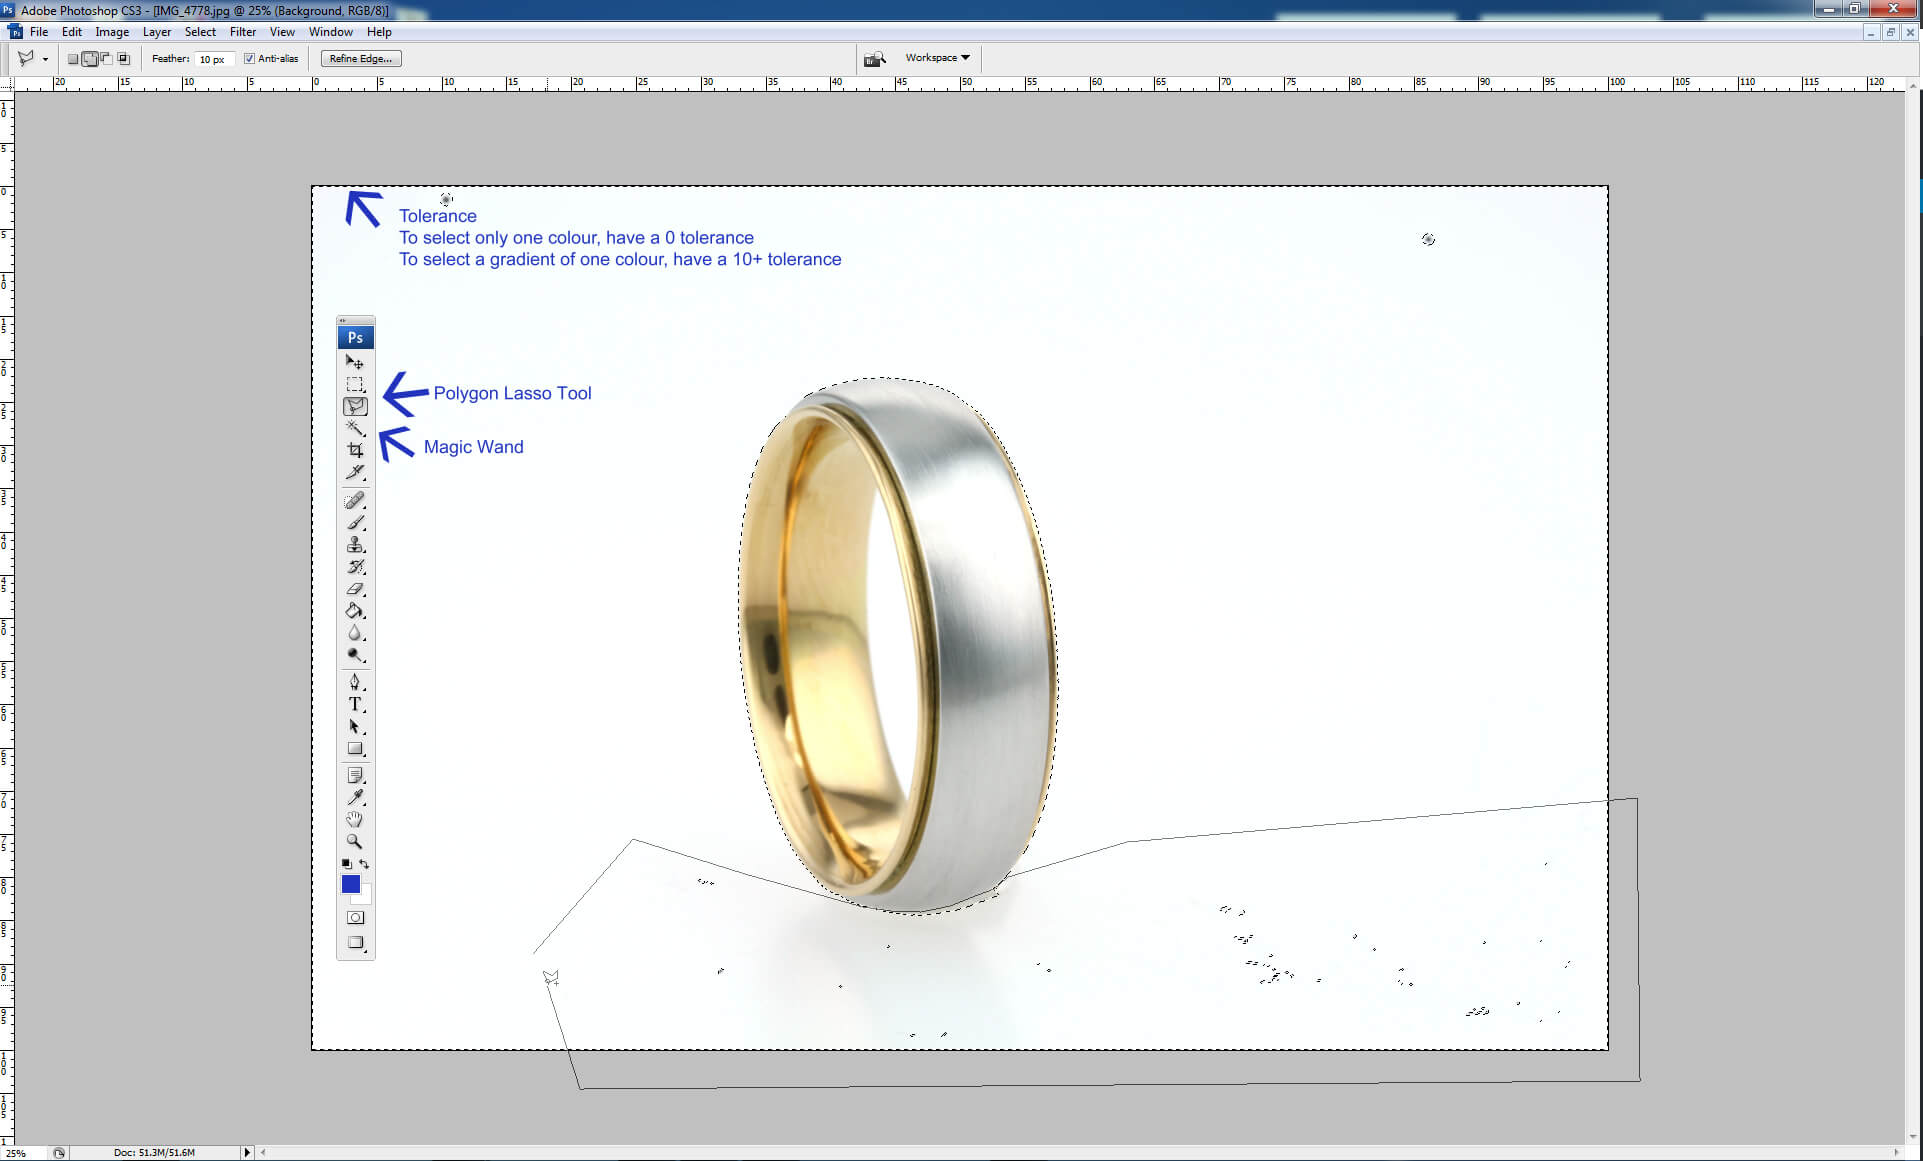
Using the lasso tool to select the background
You will find there are areas you cannot select with the wand tool. Using the lasso tool (pressing shift on the first click) you can carry on clicking around areas you want to select. You may need to zoom in close to draw around some areas well.

Using the Smooth Tool
Once you have your nice selection you need to smooth the line using the smooth tool from the toolbars shown above. I would choose a value of around 2.
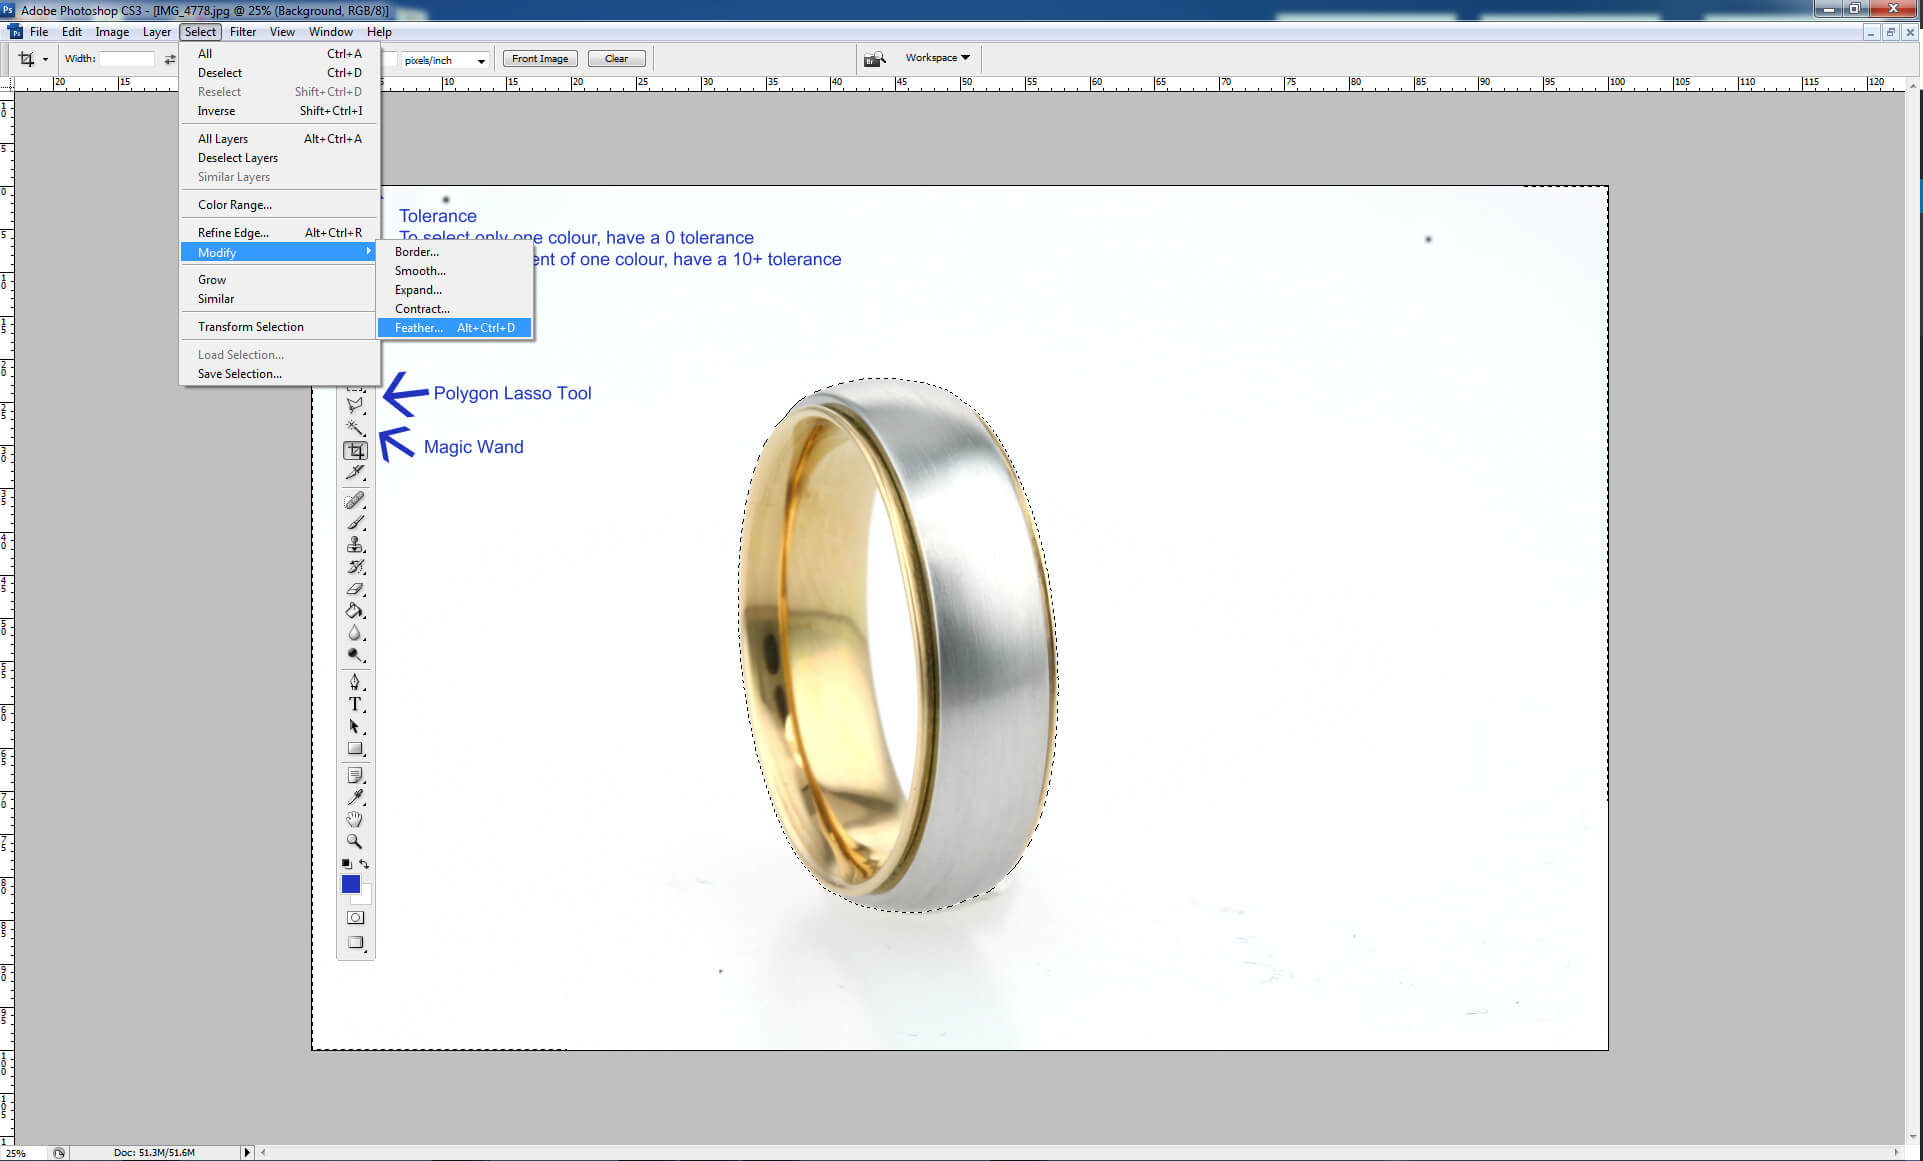
Using the feather tool
Then use the Feather tool, this fades the selection you have made and helps to avoid any obvious errors you have made. I would choose a value of around 2.
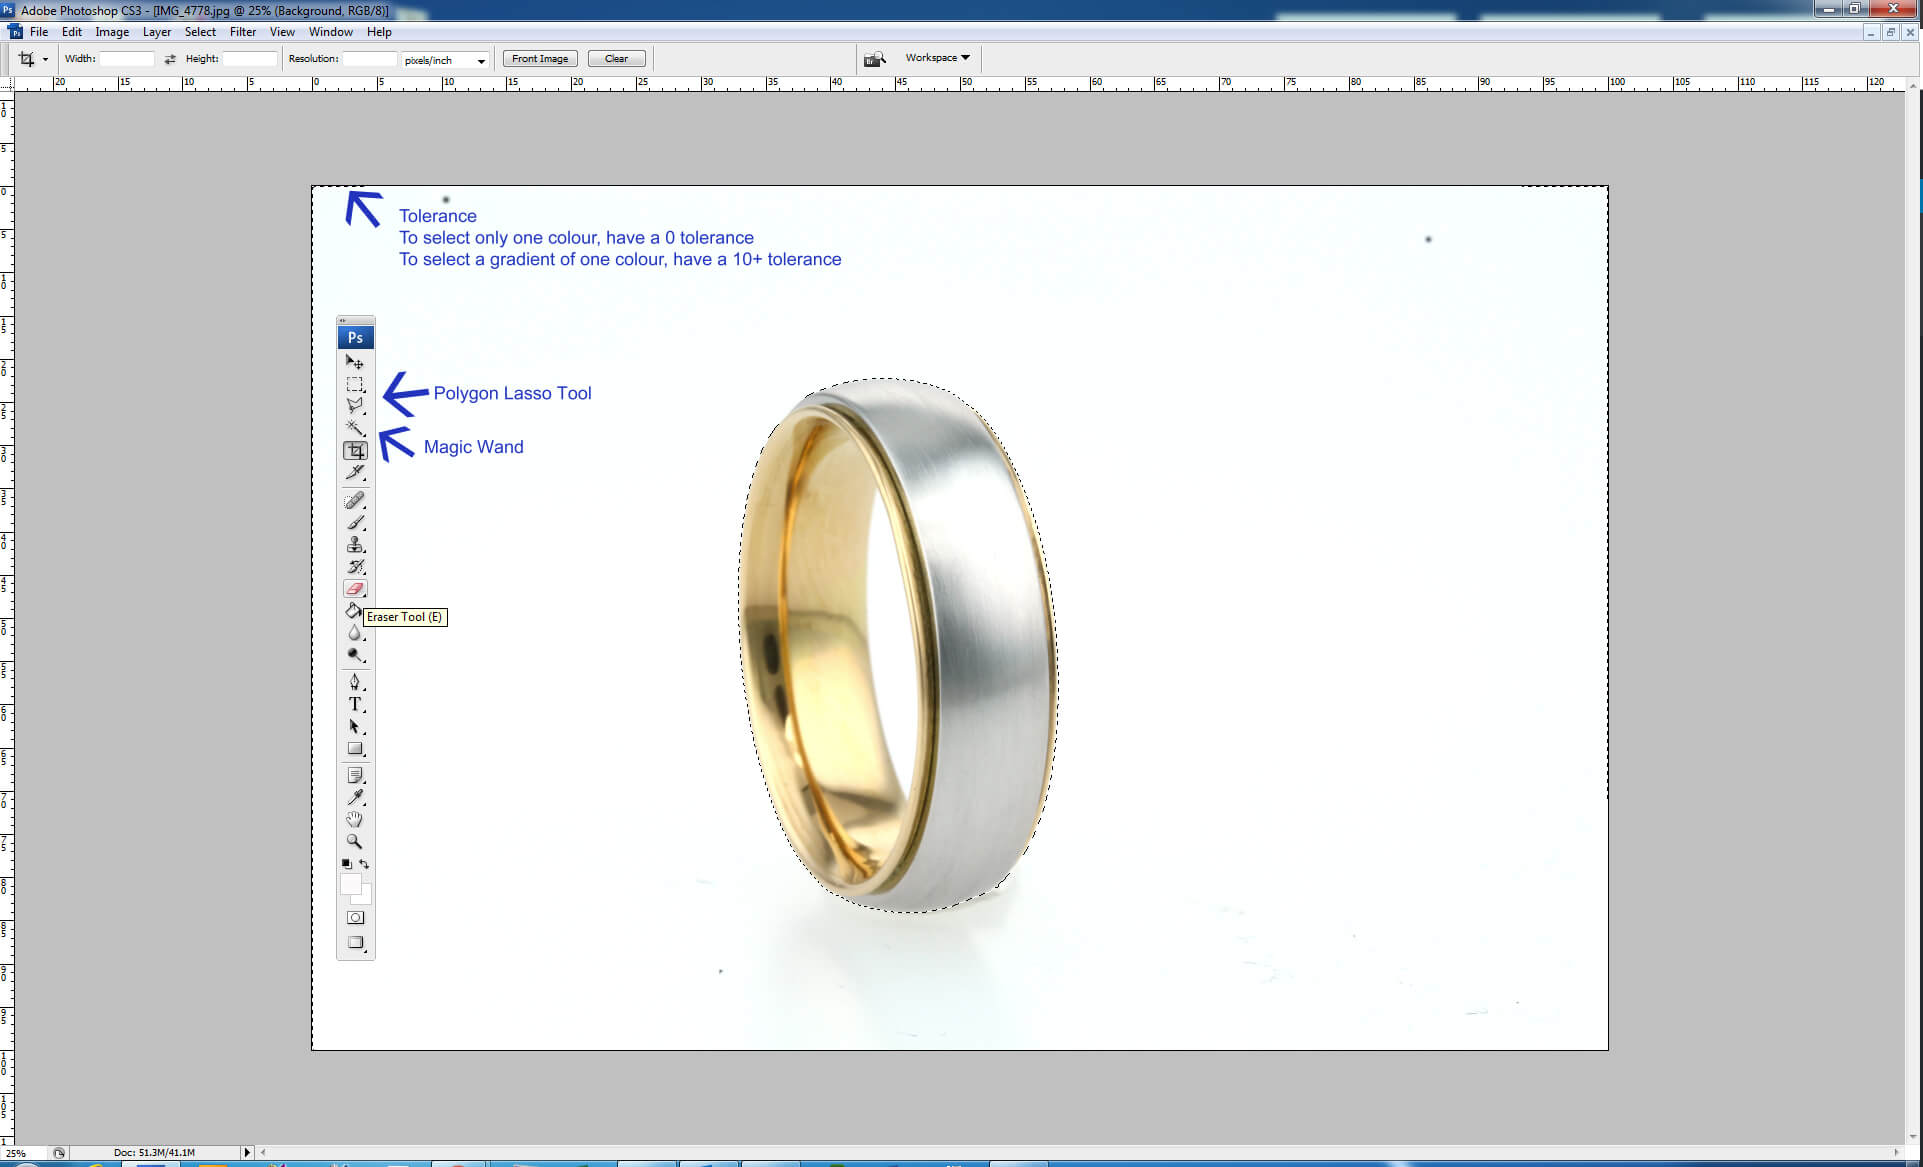
Using the Erasure tools
Now you will have a nice selection of the whole background. You can use the erasure tool to remove any dirt in the background.
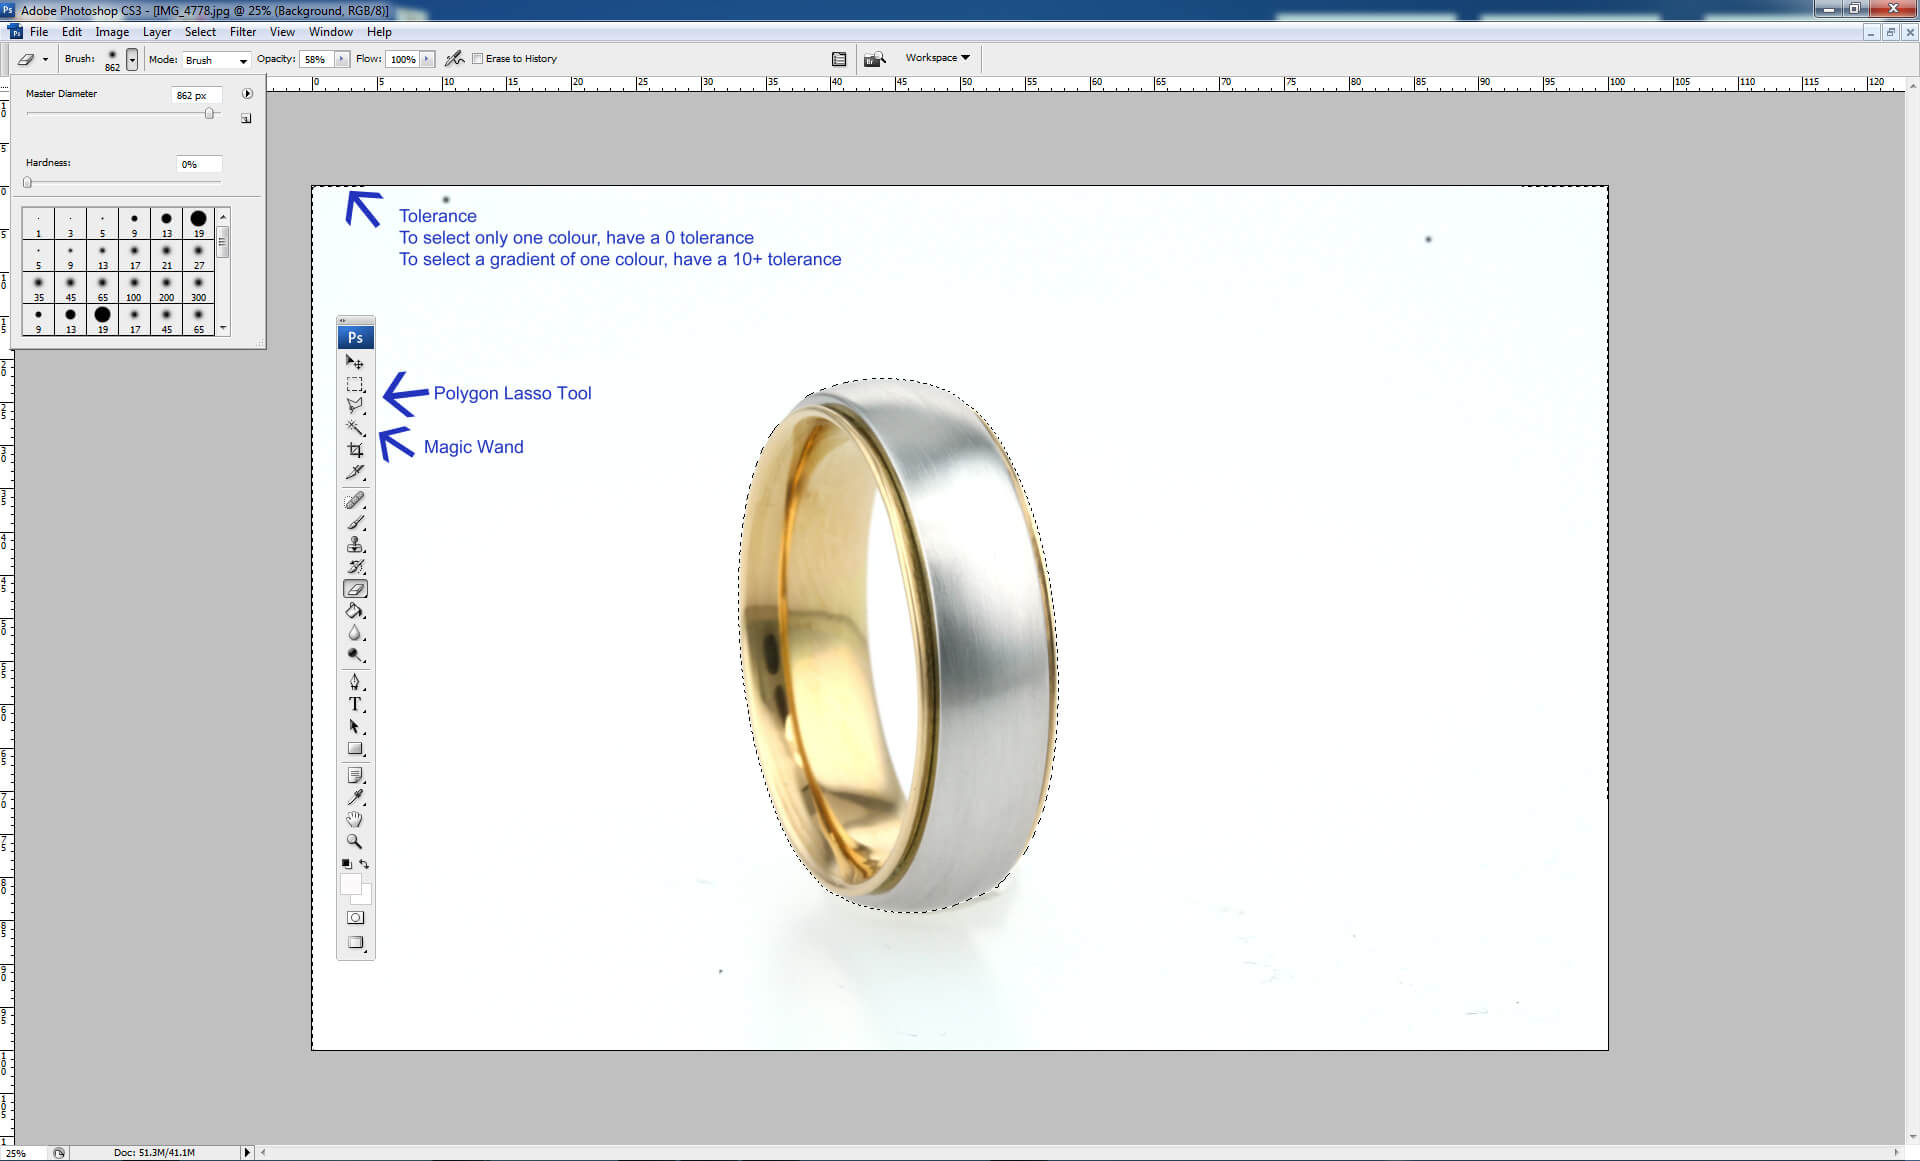
Change the brush on the erasure tool
You can change the erasure settings using the toolbars at the top of the page.
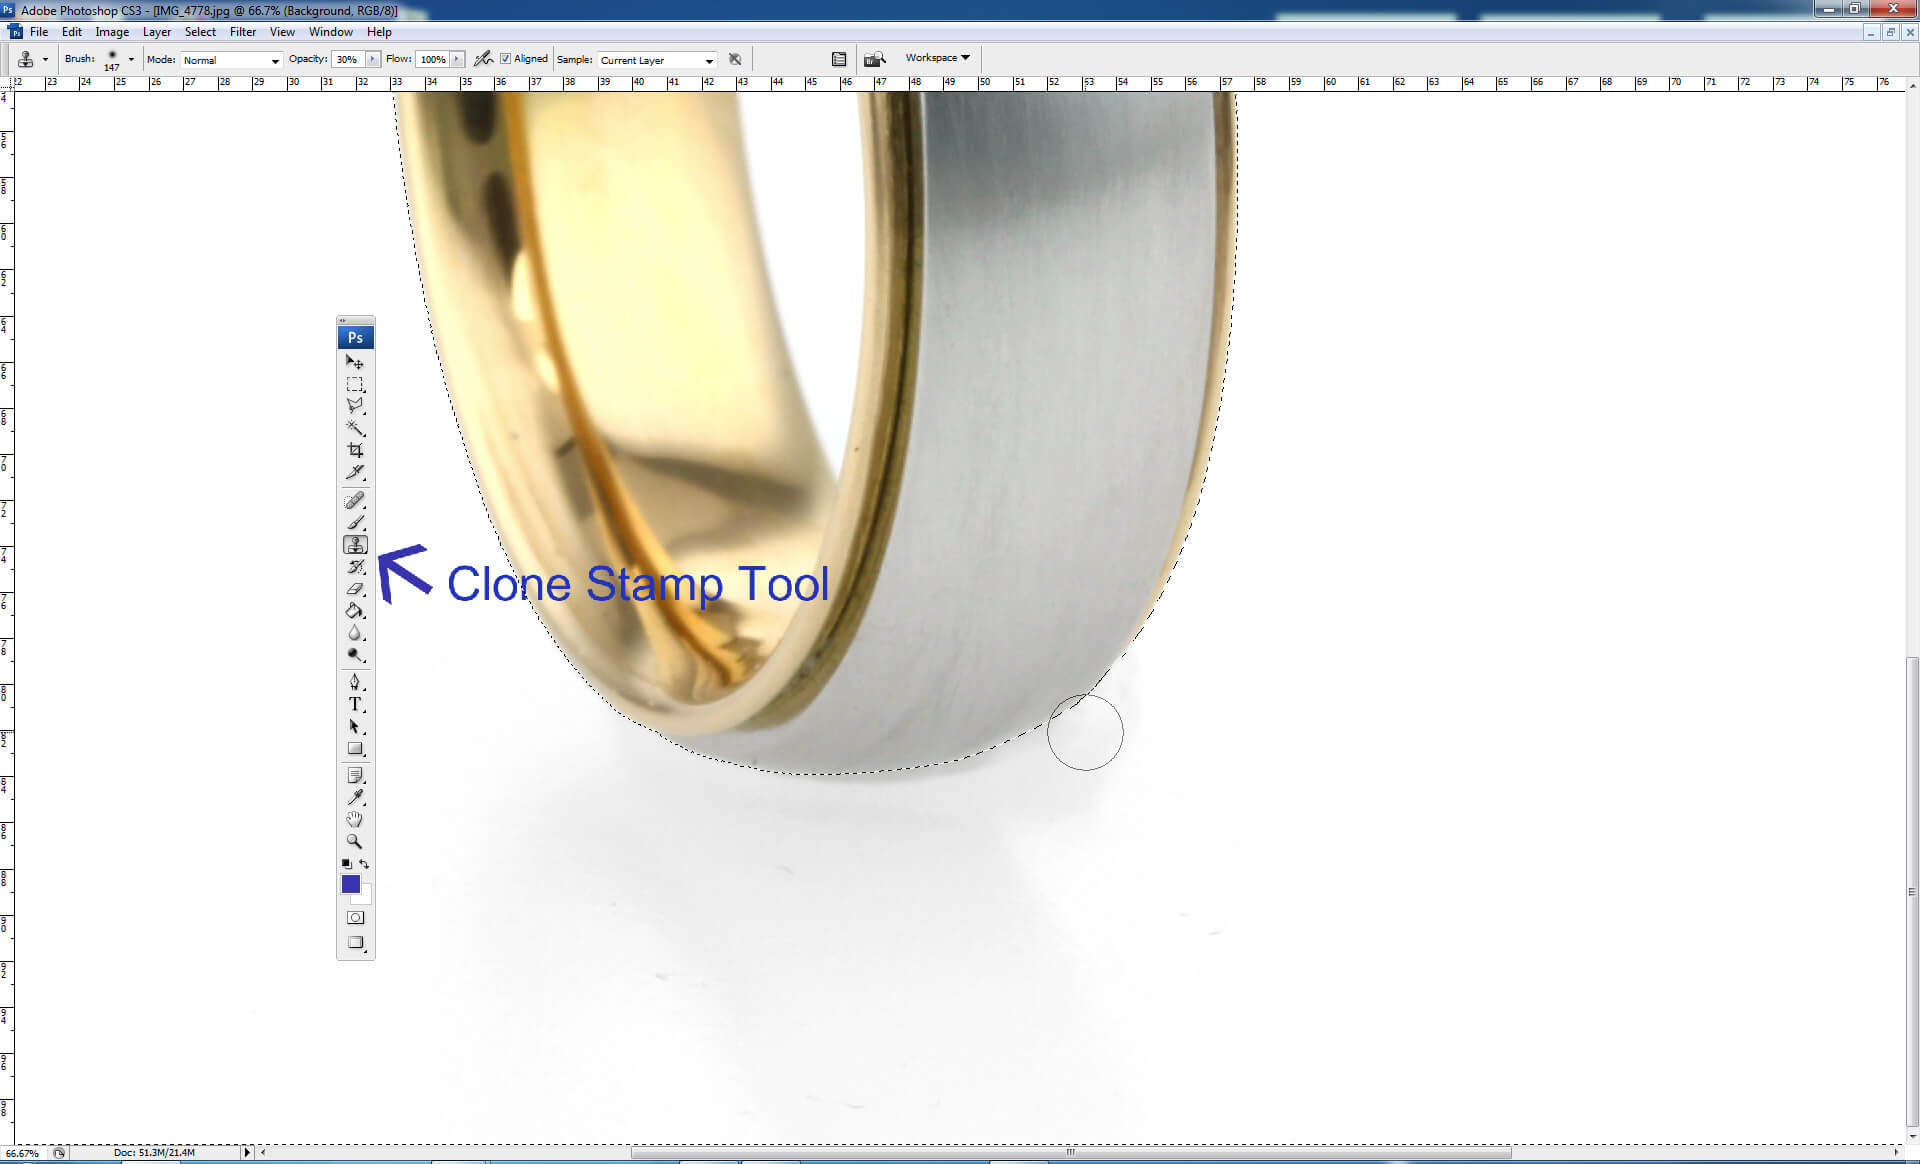
Using the Clone Tool
For the areas that are not white, you can use the clone tool. Whilst pressing the ALT button to select an area close to the area you want to correct (in this case I am removing the white-tac) and then click on the area you are correcting. It clones the area you pre-selected and places it over the white tac. Make sure you use a fluffy brush of the right size and a low opacity using the top toolbar. Go slowly and you will get a better result.
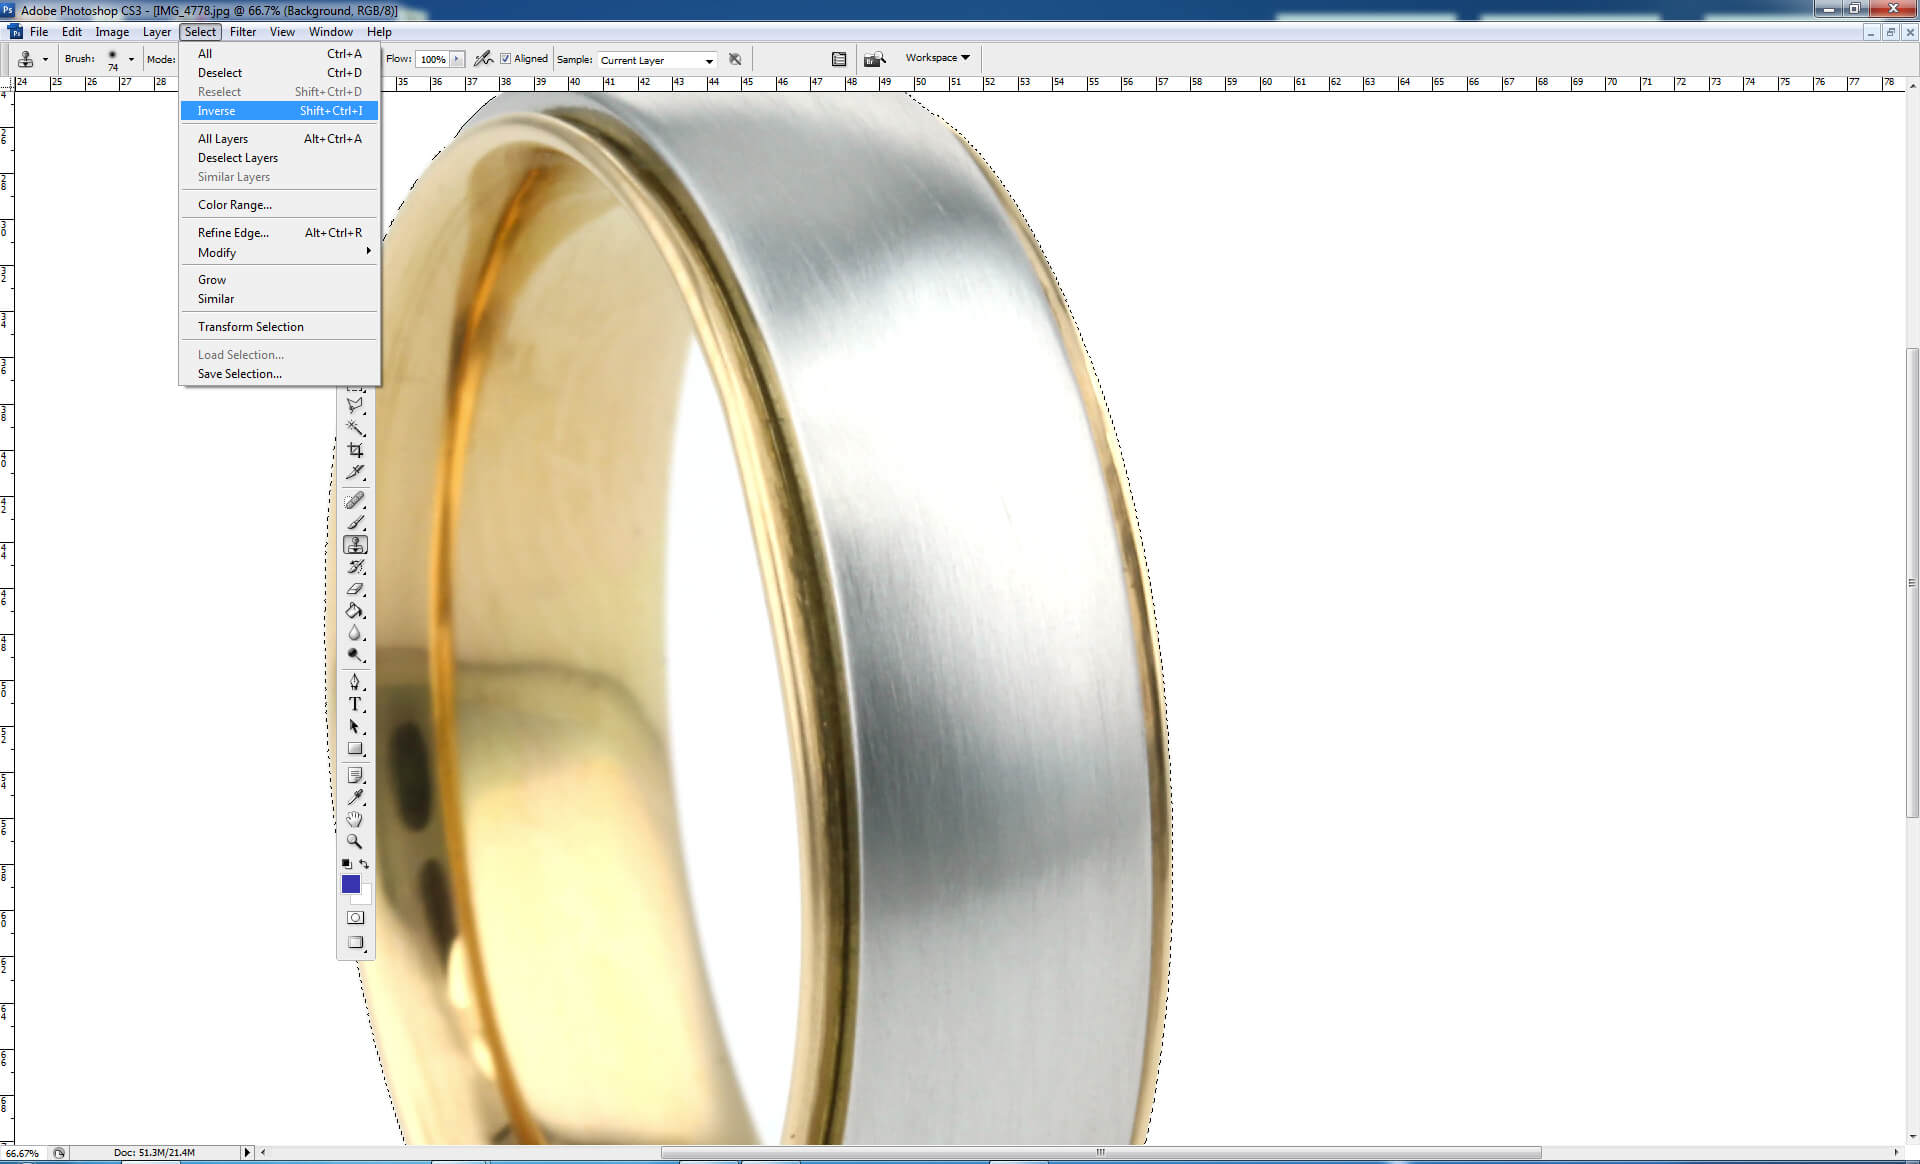
Inverting the selection to work on the ring.
You may like to edit the actual ring as well as the background. Press select: inverse, you have now inverted the selection and can work on the ring without editing the background. You may want to use the clone tool for instance to remove fingerprints. Once you are happy with your background as well as the jewellery you can save your photograph.
For good practice, I save several versions of the same image for different purposes. I save 1 image as a TIFF file, this will be your master image and the largest file. I then save 1 image as a jpeg, you can then open the image in TinyPNG to give you an optimisedized image that will not slow down your website.

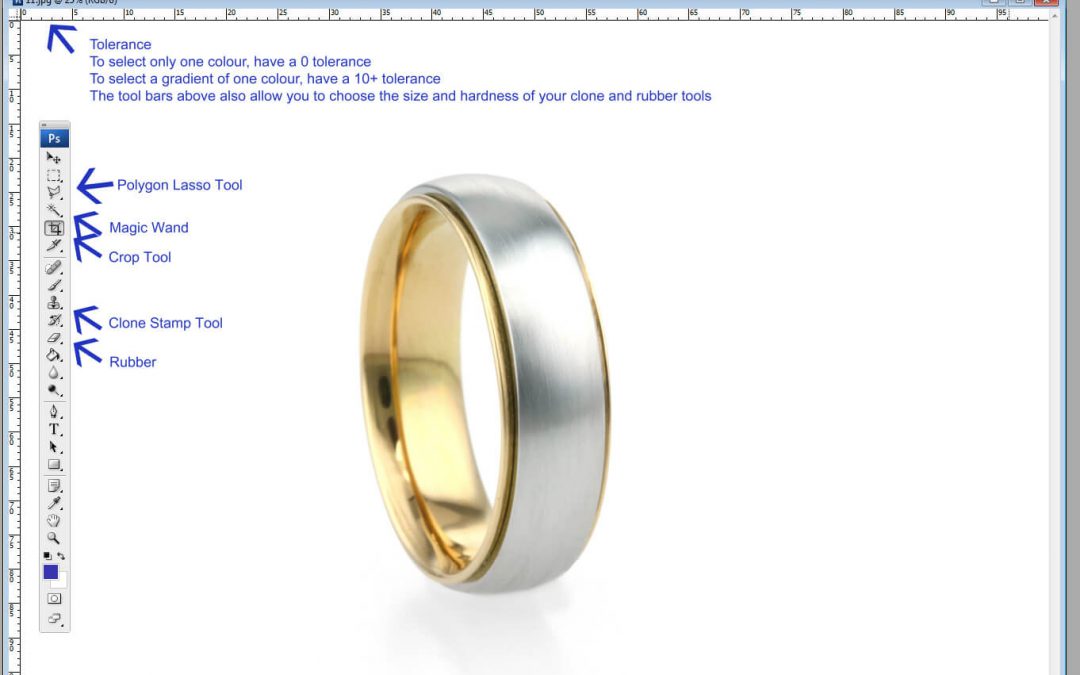
All of the tools used
The above image shows all of the tools I have used in Photoshop and below shows you the final result. Silver needs MUCH MORE editing. It is so reflective that simply changing the levels at the beginning bleaches out the jewellery. I very carefully draw around the jewellery using a combination of the wand and lasso tool, this can take some time. I will also use LAYERS to save different stages separately BEFORE changing the levels of the background. I have even been known to rhodium plate pieces so It’s easier to photograph!

It’s not necessary to have the same equipment as me but this is what I use:
Canon DS100D
Sigma 105mm f/2.8 EX DG OS HSM Macro (Nikon AF)
Calumet Cocoon 70 – MediumCalumet Light Box (A3)
Interfit F5 2-Head Fluorescent Lighting Kit
I hope this helps, happy editing!


Recent Comments